

Who doesn’t want to be a mermaid? I don’t know many moms that didn’t grow up watching The Little Mermaid so it’s no wonder that the sea is a very common inspiration for little girls’ rooms. Mermaid themed rooms are always beautiful and there’s no way to go wrong! There are so many styles of this theme and it allows you to go as over-the-top as you want. The more you do, the more magical the room!
I chose to keep things simple, for now, and stuck with a main wall mural as the focal point with decals on other walls. I also love this theme because there’s so much you can add on over the years! When I decided to re-vamp their rooms, I wanted to do themes that I could add onto that would change the entire feel if I wanted. I didn’t want to do a room just to have them want to change it entirely in a year or two. This theme allows you and your little mermaid to add and change things together in the future and it will feel like a totally different room with minimal effort.
In this post I am going to go over the mural wall and how to get a perfect mural without needing to be a professional artist.

Here is what you’ll need:
- Paint brushes of all sizes
- Sponges of all sizes
- Painters tape
- Pencil
- Rag and rubbing alcohol
- Quarter, nickel, penny, and a dime (you’ll see).
- Ladder
- Measuring tape
- Level
- Paint for all over the room: After a zillion samples, there was only one that was a clear winner. I chose this beautiful pink called Pink Sea Salt by Behr. This pink is bright without giving you a migraine and works really well with both warm colors and cool.
- A small paint kit with all different colors. You don’t need a lot. Just enough to paint the upper body of the mermaid. (Yellow, brown, black, white, red, pink, and one for the eye color of your little gal.
- 2+ colors of metallic paint. I chose pink, purple, green, and blue. The more, the better.
- Mermaid decals. There are TONS of options on Etsy and Amazon that will have the colors you are looking for. Here are the Mermaid Glitter Decals that I used.
- Fish scale stensil. You can make your own, but I got my Fish Scale Trellis Stencil here.
- A name decal. I used this Mermaid Personalized Name Decal and LOVE it! You can customize it however you want and it was super easy to apply.
Step 1: Pick your Mural
This part is a little tricky. Once you pick your main wall that you want to mermaid mural, you’ll need to visualize the placement of it and how big you want it. Make sure you take into consideration the furniture you will have along that wall. I wanted the mural to be above her crib and someday above her bed. So, I placed it high enough that a headboard wouldn’t block any of it.
Next, head to Google and look at different illustrations of mermaids. I searched “little girl mermaid clipart” and found a ton of options. I actually like the body of one and the head of another so I combined them.

I chose the body of this image

I chose the head of this silhouette (green)
I used photoshop to combine the head and body and got it to a scale that I liked that looked natural but still whimsical.
Step 2: Make a Grid
Bad at math? Me too! This part may be tricky for you too if you are also mathematically challenged. I adjusted the size of my mural based on what would be easier to figure out. I have no shame in my dumb game! 🙂
First, guesstimate the center of the image and put a mark there. Then add a grid. I used photoshop to add a grid to my image. If you don’t have photoshop, you’ll need to find something to add a grid to it. Worst case, print off the image and us a ruler and a pencil to draw a grid. *Make sure that two of the the grid lines intersect the center mark you made on the image. X marks the spot!

Once you have a grid on your image, get your pencil and measuring tape out. Measure the entire wall, top to bottom, and put a mark where the direct center is (OR where you want the center of the mural to be). Now it’s time for some math. Look at the grid on your image and count how many squares tall and wide the image is. Next, figure out how big you want to mural. Put a mark where you want to top of the mural to end, as well as the bottom and sides. Measure those distances.
Use those measurements and divide by the number of squares you counted on the grid. Example: the height I chose for my mural from top to bottom was 72 inches, and on my picture I counted 9 squares from top to bottom. 72 divided by 9 equals 8. So, this tells me that the lines on my wall need to be 8 inches apart and that each square will be 8 cubic inches.
Now you can start taping. You’ll need a ladder! Start at the center mark you made and measure 8 inches (example) above and below it. Make small pencil marks at those points. Use a level (laser light level made this soooo much easier) and tape the horizontal line. Make sure to make the tape line long enough that it will intersect with the vertical lines once you tape them. Continue this until you have all the vertical and horizontal lines taped…starting from that center mark.

Step 3: Start Sketching
Remember learning to draw in grade school? The teacher would give you a paper with an image of a dog with a grid over it and next to is was an empty grid? Then you would go square by square and copy it over and magically the full image would appear? This is exactly what you are going to do here.
Start in whichever square you want and start copying! Have the rag and rubbing alcohol ready if you need to erase a line or two and start over. Take a step back often to look at the overall picture. Change as you see fit!
Once you’re finished sketching, remove the tape, fill in the lines, and done!
Step 4: Add Details
Now that you have the outline, you need to add the details. For the head, lightly sketch the lashes, corner of mouth, nostrils, and ears. Take steps back frequently to look at the overall picture. Moving down, lightly draw the collar bone, belly button, and waist of the tail.
Here is where you grab your change! At the waistline of the tail, grab a quarter and pencil, and the trace the bottom half of the quarter. Move the quarter over and continue tracing the bottom half to make a row of scallops. Once you do the first row, move the quarter down to start a second row. Place the quarter IN BETWEEN (offset) two scallops above and start tracing.
Once you get 1/4 way down the tail, switch to the nickel. 1/2 way down, switch to the penny. 3/4 of the way down, trace a dime. This part takes time…
Step 5: Paint!
Now you can paint! Mix colors to get the shades that you want. Remember that if you feel like you “messed up” and the color is all wrong, you can always go over it until you are happy with the colors. That’s the beauty with paint: you can always paint over flaws! I used the metallic paint for the tail and I love how it turned out!
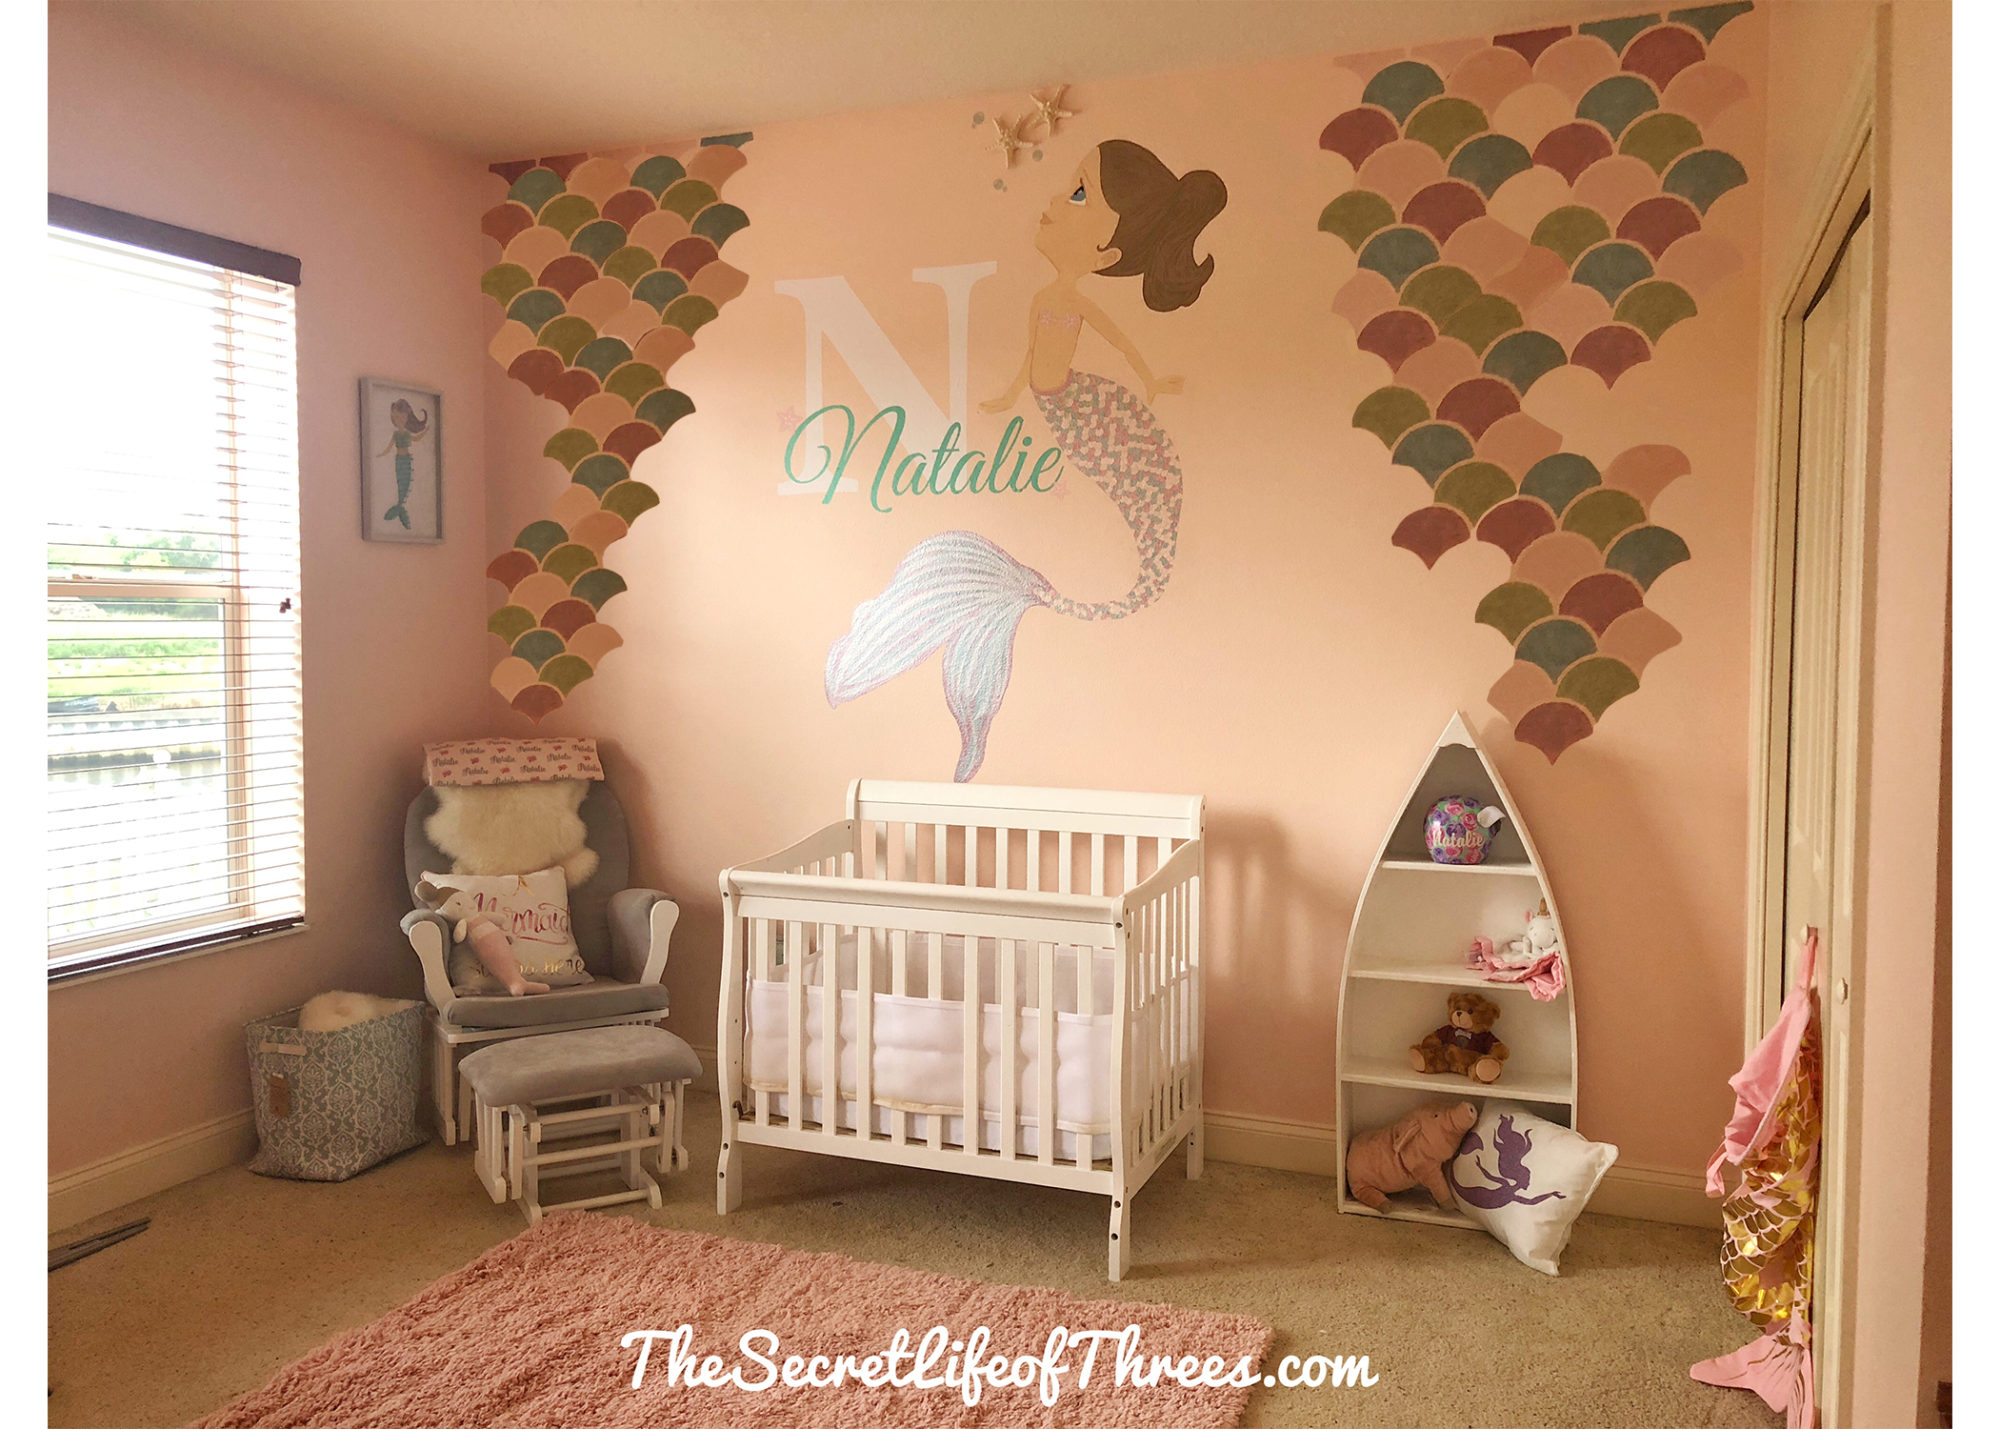
After the mermaid looks just how you want it to, you can add other details to the room! I used the scallop stencil, sponge, and metallic paint to make shiny fish scales “raining” down from the ceiling. I didn’t get close to finishing this, but I plan to go back and add these scales to every corner and every wall. I hung Mermaids Blackout Curtains, decals, and some cute Wall Art.


This room was quite a bit of work….but was SO worth it! In the future, I plan on adding sea weeds coming up from the floor (decals) and maybe even paint the ceiling blue with the bottom on a boat peaking through. The options are endless! This will be a fun room for many years to come!


Leave a Reply